
Summer Shower Caulking in Copiague, NY: A Guide

By Josh Kaplan
Key Takeaways
Silicone or siliconized latex caulk outperforms plain acrylic in wet shower environments.
Recaulk your shower every 1–5 years; inspect mid-summer when heavy use reveals early failures.
Never apply new caulk over old — full removal is required for a lasting, mold-free seal.
DIY recaulking is manageable for small joints; large or tile-deep failures need a professional.
Summer humidity in Copiague accelerates mold growth in compromised caulk seams.
Summer Shower Caulking in Copiague, NY: What Homeowners Need to Know
Summer shower caulking in Copiague, NY is the practice of inspecting, removing, and replacing the waterproof sealant along shower seams during the warm season — when increased household water use, rising humidity, and warm temperatures combine to stress existing caulk and accelerate mold growth. A fresh, intact caulk line is the last line of defense between your tile surround and the framing behind it. Getting it right before minor cracking becomes a water-damage repair is exactly the kind of mid-season maintenance that saves thousands of dollars down the road.
Why Summer Is a Critical Season for Shower Caulk in Suffolk County
Summer in Copiague and across Suffolk County brings two forces that are hard on shower caulk: elevated indoor humidity and significantly heavier shower use. When families are home from school, guests are visiting the Hamptons-area shore, and air conditioning is cycling around the clock, bathroom moisture levels spike. That combination softens caulk adhesion, feeds mold colonies hiding in microscopic surface cracks, and causes the thermal expansion of tile and substrate that literally pulls caulk away from the joint.
The change joints at the floor-to-wall transition and at inside corners are especially vulnerable. Those are the spots where two different surfaces — typically a tile wall panel and a fiberglass or porcelain floor pan — move independently. A quality silicone caulk is flexible enough to absorb that movement; rigid grout is not, which is why the Tile Council of North America specifies caulk (never grout) at all change-of-plane joints in a shower.
Mid-summer is also an ideal inspection window. You've had weeks of heavy use since spring, so any failing seam has had plenty of opportunity to show itself — staining, peeling edges, or a hollow flex when pressed. Catching it now means you're not heading into fall with an active leak feeding mold inside the wall cavity. If you're unsure what to look for, reviewing the 5 signs you need new shower caulk before mold spreads is a useful starting point before you begin your inspection.
What Is the Best Kind of Caulk to Use in a Shower?
The best caulk for a shower is 100% silicone or a siliconized latex (also called "silicone-modified acrylic") formula rated for wet areas and mold resistance. Here is how the three main types compare in a real shower environment:
Caulk Type | Flexibility | Mold Resistance | Paintable | Best For | Avoid When |
100% Silicone | Excellent | Excellent | No | Floor-to-wall joints, any movement joint | You need to paint over it later |
Siliconized Latex | Good | Good | Yes | Tub surrounds, wall-to-wall inside corners | High-flex change joints on floating floors |
Plain Acrylic / Latex | Poor | Fair | Yes | Dry interior trim only | Any wet shower surface — it will fail quickly |
The practical takeaway: for the floor-to-wall joint and inside corners of a tile shower, a 100% silicone rated for kitchen and bath is the professional standard. For tub surrounds where slight texture or paintability matters, a high-quality siliconized latex works well. Plain acrylic caulk has no place in a shower and will crack or peel within months.
How Often Are You Supposed to Recaulk a Shower?
You should inspect shower caulk annually and plan to replace it every one to five years, depending on the quality of the original product, how heavily the shower is used, and whether the substrate moves significantly. A single-occupant shower with quality silicone caulk may go five years without issue. A family bathroom with a fiberglass pan — which flexes noticeably underfoot — may need recaulking every twelve to eighteen months because that flex continuously stresses the bond.
Summer is an especially useful inspection moment: press gently along every caulk seam with a finger. Any seam that flexes hollow, shows discoloration deeper than the surface, or has visible gaps is overdue for replacement.
Can I Put New Caulk Over Old Caulk in the Shower?
No — applying new caulk over old caulk in a shower almost always fails, often within weeks. The new layer bonds to the old caulk surface rather than to the tile and substrate directly. As the old caulk continues to peel or shrink, it pulls the new layer with it, and any mold embedded in the original bead is sealed in rather than removed. Complete removal of the old caulk is required for a lasting, mold-free result. A detailed walkthrough of that process is covered in this complete guide to removing old caulk from a shower.
Is It Difficult to Recaulk a Shower Myself?
DIY recaulking is manageable for a confident homeowner tackling small, accessible seams in good condition, but the process has meaningful failure points that trip up most first-timers. Here are the steps in order:
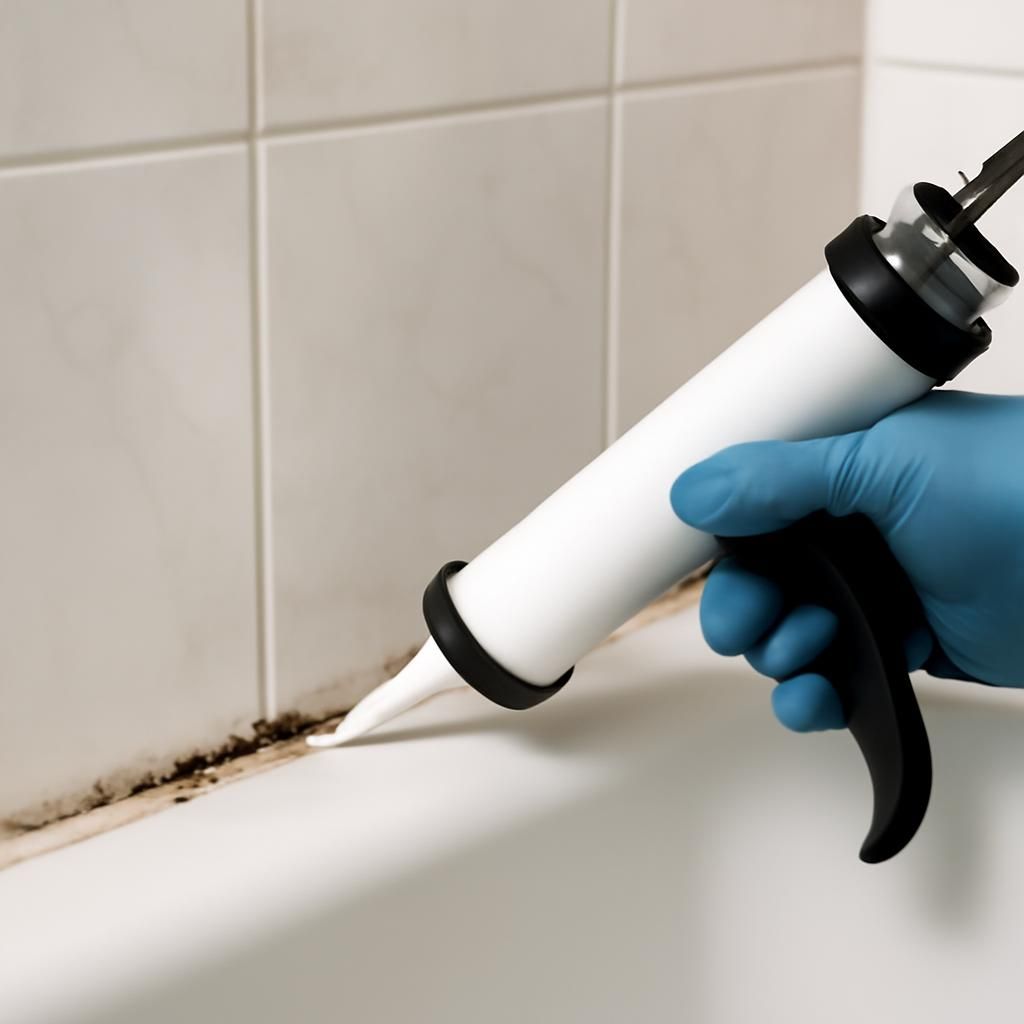
Remove all old caulk using a plastic or oscillating-tool scraper. A dedicated caulk removal tool (the Fein MultiMaster with a caulk blade, for example) makes clean removal on tile much faster than manual scraping and reduces the risk of scratching the tile face.
Clean and disinfect the joint with rubbing alcohol or a diluted bleach solution, then allow it to dry completely — 24 hours minimum in humid summer conditions.
Fill the tub or shower base with water before caulking so the pan is at its maximum expansion point. Caulk applied to an empty pan may crack the first time the pan flexes under weight.
Apply painter's tape on both sides of the joint for a clean line.
Apply caulk in one continuous bead, tool it immediately with a wet finger or a caulk-finishing tool, and remove the tape before the surface skins over.
Cure fully before use — 24 hours minimum for siliconized latex, 48–72 hours for 100% silicone in a ventilated bathroom.
Where DIY is NOT the right choice: if the joint shows mold staining that extends behind the tile, if grout is missing or crumbling along the same wall, or if there is any softness or discoloration in the drywall or backer board behind the tile, those are signs of active water infiltration that requires professional assessment before any surface repair.
Are You Supposed to Caulk Over Grout in the Shower?
Caulk should replace grout — not go over it — at all change-of-plane joints: floor-to-wall transitions and inside vertical corners. Grout is a rigid material with no elasticity, so it will crack at joints where two surfaces move differently. The Tile Council of North America's Handbook for Ceramic, Glass, and Stone Tile Installation is explicit that these joints must be filled with a flexible sealant, not grout. Applying caulk over intact grout on flat wall fields or floors is generally not necessary or appropriate.
What Can You Use Instead of Caulk in a Shower?
No practical substitute for caulk exists at shower change joints in a residential setting. Some installers use pre-formed silicone corner strips as a supplemental layer over a caulked joint for added protection, but those strips still require a caulked substrate to seal properly. Grout, as noted above, is not a substitute at movement joints. Epoxy grout is more water-resistant than standard sanded grout for field tiles but still lacks the flexibility needed at corners and transitions. For all practical purposes, a quality silicone caulk is the correct and only appropriate material for sealing shower seams.
What Does Shower Recaulking Cost?
Professional shower recaulking typically runs between $150 and $350 for a standard tub-shower surround, depending on the extent of prep work needed, whether old caulk removal is included, and the local market. Homes in Copiague and the broader Suffolk County area generally fall within that range, though a shower that requires mold remediation behind the tile before recaulking will cost significantly more. DIY materials — a tube of quality silicone caulk, a removal tool, and tape — run well under $30, but the labor and cure time are real costs worth factoring in. For a deeper breakdown of what Long Island homeowners typically pay, see this 2025 guide to shower recaulking costs on Long Island.
Do Plumbers Recaulk Showers?
Plumbers can recaulk around fixtures like the tub spout or showerhead escutcheon plate, but shower surround recaulking — the seams along tile joints and pan-to-wall transitions — is typically handled by tile and grout restoration specialists rather than plumbers. The distinction matters because correct shower recaulking requires surface preparation, mold assessment, and proper material selection for tile substrates, which falls squarely in the restoration trade rather than the plumbing trade.
When Should You Call a Professional Instead of DIY?
Call a surface restoration specialist — rather than attempting a DIY fix — when you notice any of the following warning signs:
Soft, spongy, or discolored drywall or backer board visible at the base of the shower
Mold that reappears within weeks of surface cleaning, indicating a colony inside the wall cavity
Cracked or missing grout on flat wall fields alongside failing caulk — both failing together suggests substrate movement or water infiltration
Tiles that sound hollow when tapped, which signals that the tile adhesive bond has failed and water has been running behind the tile
Any shower more than 10–15 years old that has never had its caulk replaced
Groutastic provides professional caulk removal and replacement as part of its residential surface restoration services in Copiague, NY and surrounding communities including Westhampton Beach, Amagansett, and Southampton. Rather than applying a new bead over old material, the process involves complete removal, surface preparation, mold inspection, and proper resealing with the right product for the substrate — the standard that makes the difference between a repair that lasts a season and one that lasts years.
Frequently Asked Questions: Summer Shower Caulking
How long does recaulked shower caulk last?
A professionally applied bead of 100% silicone shower caulk in a moderate-use bathroom typically lasts three to five years before replacement is warranted. High-traffic bathrooms or showers with a flexible fiberglass pan may need attention every one to two years due to the repeated flex stress on the joint.
How soon can I use my shower after recaulking?
Wait at least 24 hours for siliconized latex caulk and 48–72 hours for 100% silicone before exposing the joint to water. In Copiague's humid summer conditions, err toward the longer end of those ranges to ensure full cure.
Does homeowner's insurance cover water damage from failed shower caulk?
Most standard homeowner's policies treat failed caulk as a maintenance issue rather than a sudden loss, meaning water damage from a slow seam leak may not be covered. Check your specific policy, but the best protection is timely maintenance — not a claim.
Conclusion: Don't Let Summer Humidity Win
Summer shower caulking in Copiague, NY is a straightforward maintenance task when addressed early — and an expensive structural repair when ignored. Inspect your shower seams now, mid-season, while there's still time to act before the problem compounds. Use the right product (silicone or siliconized latex, never plain acrylic), remove old material completely before resealing, and call a professional when the damage goes beyond the surface. For a broader look at how seasonal timing affects shower caulking decisions across the region, the summer shower caulking seasonal guide for Baldwin, NY covers many of the same principles that apply here in Copiague.
This article is based on real published content from Groutastic, cites authoritative sources, and is reviewed before publication.
Comments