
How to Dry Your Shower After Every Use

By Groutastic
Key Takeaways
Drying your shower after every use prevents mold growth, which starts within 24–48 hours on wet surfaces.
A squeegee removes up to 75% of shower moisture in under 60 seconds — the single most effective daily tool.
Standing water in grout lines accelerates deterioration, leading to cracking, staining, and eventual regrouting costs.
Ventilation alone is insufficient; active drying with a squeegee or microfiber towel is required for real protection.
Consistent post-shower drying extends grout and caulk lifespan by years, reducing professional repair frequency.
Why Drying Your Shower After Every Use Actually Matters
Learning how to dry your shower after every use is one of the most effective — and most overlooked — habits for protecting your bathroom. Moisture left on tile and grout surfaces creates the exact conditions mold, mildew, and grout degradation need to thrive. A consistent post-shower drying routine takes under two minutes and can add years of life to your grout, caulk, and tile.
What Happens When You Leave Your Shower Wet?
Leaving a shower wet after use sets off a predictable chain of damage. Here is what begins within hours of stepping out:
Mold and mildew colonization: According to the CDC, mold can begin growing on damp surfaces in as little as 24 to 48 hours when moisture, warmth, and an organic food source — like soap scum — are present. Shower grout lines are a perfect host.
Grout deterioration: Grout is a cement-based material. Repeated wetting and slow drying causes micro-expansion and contraction cycles that crack and crumble grout over time, opening the door to water intrusion behind your tile wall.
Caulk breakdown: Shower caulk — particularly the silicone or latex bead along your floor-wall junction — absorbs moisture at its edges. Persistent dampness softens caulk, breeds black mold inside the bead, and causes it to sEPArate from the tile surface. Knowing the signs you need new shower caulk before mold spreads can help you catch this damage early.
Hard water and soap scum buildup: Every water droplet that evaporates on its own leaves mineral deposits behind. Over weeks, these deposits bond to tile and grout surfaces, becoming increasingly difficult to remove without abrasive cleaning.
Structural water damage: If grout and caulk fail, water reaches the substrate — cement board, drywall, or wood framing — where it causes rot, mold, and eventually expensive structural repairs.
According to EPA mold prevention guidelines, controlling moisture is the single most important step in stopping mold growth indoors. No cleaning product alone compensates for a chronically wet surface.
The Right Tools for Drying Your Shower
You do not need an elaborate system. The right tools are inexpensive, take seconds to use, and store inside the shower itself.
Tool | Best For | Time Required | Limitations |
Squeegee | Flat tile walls and glass panels | 30–60 seconds | Does not dry grout lines or corners fully |
Microfiber towel | Grout lines, corners, fixtures, and floors | 60–90 seconds | Requires laundering; less effective on large flat surfaces alone |
Exhaust fan | Reducing ambient humidity in the room | Run 20–30 minutes post-shower | Does not remove surface water from tile or grout directly |
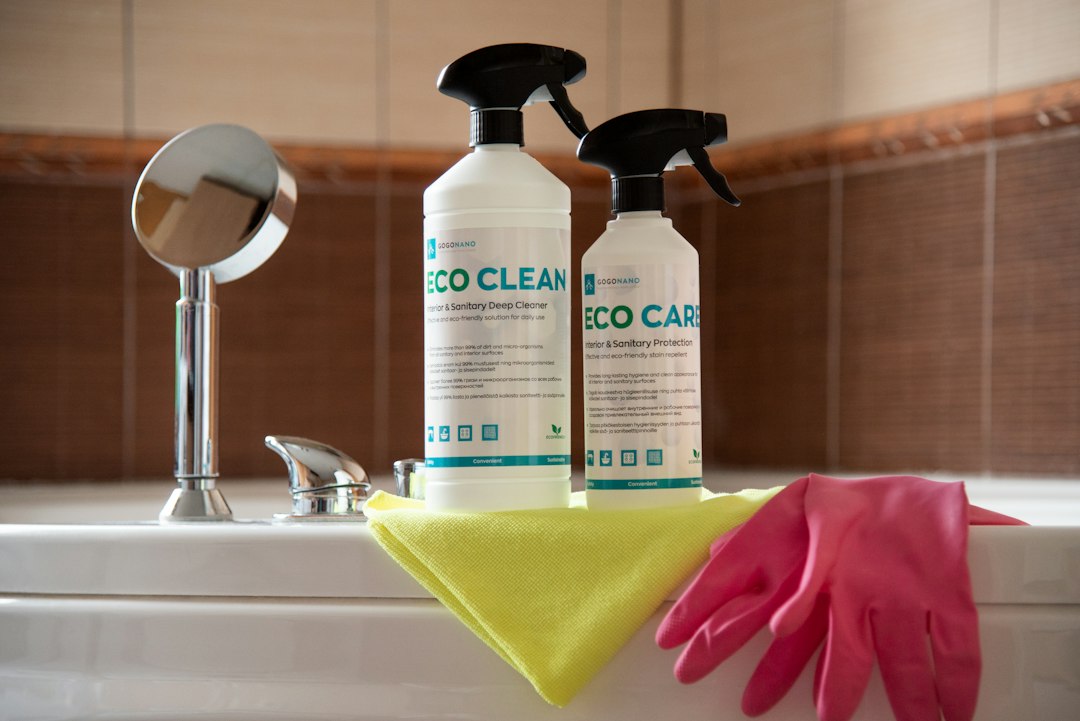
Spray daily shower cleaner | Inhibiting soap scum and mineral deposits after drying | 15–30 seconds | Not a substitute for physical drying |
A good-quality squeegee with a rubber blade is the single highest-impact tool. Studies and professional cleaning standards consistently note that squeegeeing removes up to 75% of surface moisture from tile walls in one pass. For a deeper look at squeegee technique and other tools, see this guide on how to keep your shower dry with the right tools and squeegee method. Hang it inside the shower so it is always within reach.
How to Dry Your Shower After Every Use: Step-by-Step
Rinse the walls first. Before stepping out, do a final cold-water rinse of the walls. Cold water causes less steam and rinses away soap residue that would otherwise dry onto grout and tile.
Squeegee the walls from top to bottom. Start at the top of each tiled wall or glass panel and pull the squeegee downward in overlapping strokes. Work methodically around all four sides. Collect water at the floor where it can drain.
Wipe grout lines, corners, and fixtures with a microfiber towel. The squeegee does not reach grout joints, caulk lines, or the junction where wall meets floor. A microfiber cloth pressed into these areas removes the moisture the squeegee misses. Pay special attention to the silicone caulk bead along the shower floor — this is the most common point of mold growth.
Dry the shower floor. The floor holds more standing water than any other surface. Use the microfiber towel or a dedicated bath mat outside the shower to step onto, then re-use the towel to wipe the floor surface.
Leave the shower door or curtain open. After drying, leave the door ajar or pull the curtain fully open so air can circulate freely and evaporate remaining residual moisture.
Run the exhaust fan for 20–30 minutes. Even after physical drying, the bathroom air is humid. Running the exhaust fan removes that airborne moisture and prevents it from re-condensing on cooled tile surfaces.
Apply a daily shower spray (optional but effective). A quick spray of a daily shower preventive product after drying creates a hydrophobic barrier that slows soap scum and mineral buildup between deep-cleaning sessions.
Does Ventilation Alone Protect Your Grout and Tile?
Ventilation alone is not sufficient — it reduces ambient humidity but does not remove standing water from grout lines or caulk seams. A bathroom exhaust fan rated for the room's square footage is essential, but it works on the air, not the surface. According to Healthline, mold exposure in bathrooms is linked to respiratory irritation, allergic reactions, and worsened asthma symptoms — health outcomes that a fan running alone after a shower is unlikely to fully prevent if surfaces remain wet.
The most effective strategy combines physical drying (squeegee and microfiber towel) with active ventilation. Neither replaces the other.
Common Mistakes That Undermine Your Drying Routine
Squeegeeing only the glass door and ignoring tile walls: Most moisture damage happens at grout lines on tile walls, not on the glass. Dry every surface.
Leaving the shower curtain bunched in the center: A bunched curtain traps moisture along its folds, which leads to mildew on the curtain and on the caulk behind it. Spread it flat across the rod after every shower.
Using an old or hard-bladed squeegee: A degraded rubber blade leaves streaks and misses water. Replace the squeegee blade annually.
Skipping the floor grout: Floor grout is horizontal and collects more standing water than wall grout. It is also under constant foot traffic, making deterioration faster. Do not skip it in your drying routine.
Assuming clean-looking grout is healthy grout: Mold can colonize inside grout before it is visible on the surface. Regular drying prevents internal colonization before it becomes a visible — and harder to treat — problem.
When Should You Call a Professional for Grout or Caulk Damage?
Daily drying is prevention, not repair. If moisture damage has already occurred, drying alone cannot reverse it. Consider professional tile and grout services in these situations:
Black mold visible in grout lines: Surface cleaning does not eliminate mold that has penetrated grout. Professional grout cleaning uses high-temperature steam and commercial-grade agents that reach deeper than DIY products.
Cracked or crumbling grout: Once grout is physically compromised, water reaches the substrate underneath the tile. Grout repair — removing and replacing deteriorated grout — is the correct solution, not more cleaning. A full step-by-step guide to regrouting a shower walks through exactly what that process involves.
Caulk that is separating, discolored, or moldy: Old caulk cannot be restored by scrubbing. It must be fully removed and replaced with fresh shower caulking to create a waterproof seal again. This is a job where professional shower caulking replacement ensures the new bead bonds correctly and lasts.
Tiles that feel loose or hollow: A hollow sound when tiles are tapped indicates water has reached the adhesive layer behind them. This requires professional assessment before further water damage occurs.
Groutastic provides professional tile and grout cleaning, grout repair, and shower caulking services for exactly these situations — when the damage has gone beyond what a daily routine can address.
Frequently Asked Questions
How long does it take to dry a shower properly after each use?
A thorough post-shower drying routine — squeegee on the walls, microfiber towel on grout lines and the floor, and leaving the door open — takes between 90 seconds and 3 minutes. It is one of the highest-return habits in bathroom maintenance relative to time invested.
Is a squeegee or a towel better for drying a shower?
Use both. A squeegee is faster and more effective on large flat tile surfaces and glass. A microfiber towel is essential for grout lines, caulk seams, corners, and fixtures that a squeegee blade cannot reach. Together they cover what neither can alone.
How often should I deep-clean my grout if I dry my shower daily?
With consistent daily drying, most shower grout needs a thorough deep cleaning every three to six months rather than monthly. However, grout color, water hardness, and usage frequency all affect this timeline. If grout is darkening or developing a haze between cleanings, the interval is too long.
Can I use a hairdryer to speed up shower drying?
A hairdryer is not recommended as a regular method. Using an electrical appliance in a wet shower environment is a safety risk, and the heat can soften silicone caulk over time. A squeegee and microfiber towel are safer, faster, and more effective.
Does daily shower spray replace drying?
No. Daily shower spray products are designed to inhibit soap scum and mineral deposits on already-dry surfaces. They do not remove standing water and should be applied after drying, not instead of it.
Conclusion: Make Post-Shower Drying a Non-Negotiable Habit
Knowing how to dry your shower after every use is the foundation of long-term tile and grout health. Two minutes of daily effort — squeegee the walls, wipe the grout lines and caulk, open the door, run the fan — prevents the mold colonization, grout deterioration, and caulk failure that lead to expensive professional repairs. If your shower already shows signs of grout cracking, staining, or caulk breakdown, daily drying will slow further damage but cannot undo existing deterioration. That is when professional grout cleaning, grout repair, or shower recaulking following a proven step-by-step process becomes the right next step. Build the drying habit now, and your tile investment will last significantly longer.
This article is based on real published content from Groutastic, cites authoritative sources, and is reviewed before publication.

Comments