
Best Shower Caulking Near Me: Coram, NY Guide

By Josh Kaplan
Key Takeaways
100% silicone caulk outlasts latex in wet shower environments and resists mold far longer.
Recaulk your shower every 1–5 years depending on visible cracking, peeling, or discoloration.
DIY recaulking is manageable for small joints but professional removal and application delivers a cleaner, longer-lasting seal.
Showering too soon — before caulk fully cures (24–48 hours minimum) — is the #1 cause of premature failure.
Average shower caulking costs range from $75–$300 depending on joint length, material, and labor.
What Is Shower Caulking and Why Does It Matter?
Shower caulking is the flexible, waterproof sealant applied along the joints where your shower walls meet the floor, fixture surrounds, and tub edges — and it is the single most important barrier preventing water from penetrating behind tiles and into your subfloor. For homeowners searching for the best shower caulking near me in Coram, NY, understanding exactly what fails, why it fails, and what a professional fix actually involves will save you from far costlier water damage repairs down the road.
What Is the Best Kind of Caulk to Use in a Shower?
The best caulk for a shower is 100% silicone — not acrylic latex, not "siliconized" latex, and not tub-and-tile caulk that is mostly latex with a small silicone percentage. Pure silicone caulk bonds directly to non-porous surfaces like ceramic tile, porcelain, and glass, stays flexible under the constant thermal expansion and contraction of a wet shower environment, and resists mold and mildew buildup far longer than any latex-based alternative.
Here is how the main types compare side by side:
Caulk Type | Best For | Lifespan in Shower | Paintable? | Mold Resistance | DIY-Friendly? |
100% Silicone | Tile, porcelain, glass, metal | 10–20 years | No | Excellent | Moderate (harder to tool) |
Acrylic Latex | Painted drywall, trim | 1–3 years in wet areas | Yes | Poor | Easy |
Siliconized Latex | General bath use | 3–5 years | Sometimes | Fair | Easy |
Polyurethane | Exterior joints, concrete | Not ideal for showers | Yes | Poor (degrades with UV/water) | Difficult |
One non-obvious detail most DIY guides skip: silicone will not bond over old silicone residue. Even a microscopic film of old silicone left behind after removal prevents the new bead from adhering properly — which is why thorough mechanical removal followed by a silicone debonder (such as a product containing methyl ethyl ketone or mineral spirits) is a professional-grade step that makes all the difference in long-term adhesion.
Should I Use Caulk or Silicone in My Shower?
In shower applications, "caulk" and "silicone" are often used interchangeably in conversation, but they are not the same thing. All silicone is a type of caulk, but not all caulk is silicone. For showers specifically, you should always choose 100% silicone caulk — the term "caulk" alone on a product label often means an acrylic or latex blend that will degrade quickly in a consistently wet environment. When in doubt, read the ingredient list: if the product is not labeled "100% silicone," it is not the right choice for shower joints.
How Often Are You Supposed to Recaulk a Shower?
You should inspect your shower caulk at least once a year and plan to recaulk every 1 to 5 years depending on usage frequency, the original material used, and how well it was applied. A walk-in shower used daily by a family will degrade faster than a guest bath used occasionally. Watch for these early warning signs that recaulking is overdue:
Visible cracking, splitting, or gaps along the caulk bead
Peeling or lifting away from the tile or tub surface
Persistent discoloration or black mold that won't scrub out
A hollow or soft feeling when you press the bead
Water dripping behind the wall or staining on the ceiling below
That last sign — water intrusion through the ceiling below a shower — means the caulk has been failing for some time and a simple recaulk may not be enough. At that stage, a surface cleaning and restoration professional like Groutastic should assess whether tile and substrate damage has already occurred. For a more complete checklist of deterioration indicators, see this guide to 5 signs you need new shower caulk before mold spreads.
What Is the Average Cost to Caulk a Shower?
The average cost to professionally caulk a shower ranges from $75 to $300 for a standard residential shower or tub surround, depending on the total linear footage of joints, the condition of the existing caulk (which affects removal time), the type of silicone used, and local labor rates. More complex jobs — such as a full walk-in tile shower with multiple corners, niches, and a glass door frame — can run higher when all seams are included. For a detailed breakdown of what Long Island homeowners typically pay, the cost to recaulk a shower on Long Island covers pricing by job size and scope.
DIY material cost alone for a tube of quality 100% silicone caulk is typically under $15, but factor in the cost of a caulk gun, painter's tape, a utility knife, silicone debonder, and backer rod (for wider joints) before deciding the savings are significant enough to offset the learning curve and risk of improper application.
Is It Difficult to Recaulk a Shower Yourself?
Recaulking a shower is a manageable DIY project for a patient homeowner tackling a small, straightforward joint — but it is deceptively easy to do badly. The two steps most people underestimate are complete removal of old caulk and surface preparation. Leaving any residue behind guarantees premature failure regardless of how perfectly you apply the new bead. If you want a thorough walkthrough of the removal process before you begin, this guide on how to remove old caulk from a shower covers every step in detail.
Step-by-Step: How to Recaulk a Shower Correctly
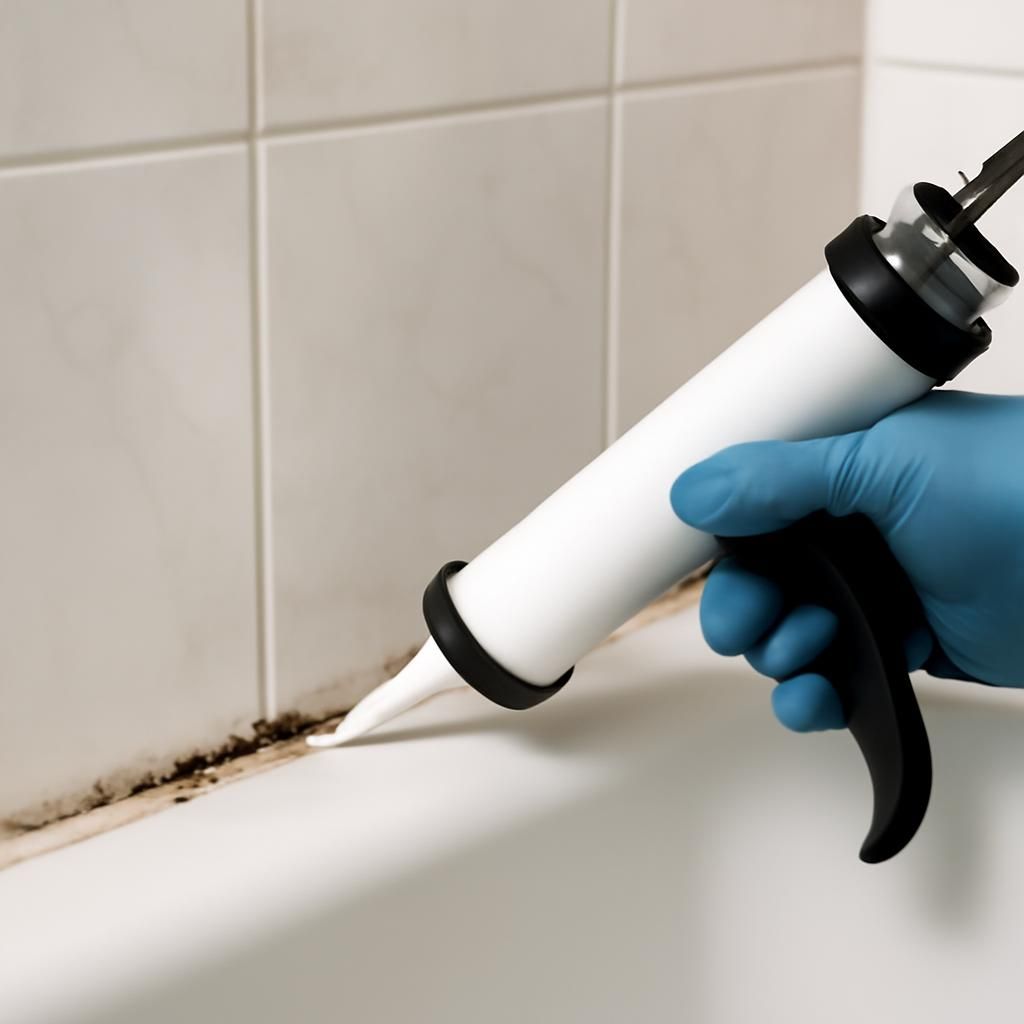
Soften and remove old caulk. Use a plastic caulk removal tool or oscillating multi-tool with a scraper blade to cut away the old bead. Apply a commercial caulk remover gel to dissolve stubborn remnants — let it dwell for the time specified on the product label before wiping.
Clean and degrease the joint. Scrub the joint with a mold-killing bathroom cleaner. Rinse completely, then wipe with isopropyl alcohol to remove any soap film. Allow to dry fully — at least 24 hours in a ventilated bathroom.
Mask the joint. Apply painter's tape on both sides of the joint to define a clean, straight edge. Overlap the tile by 3–4mm on each side.
Apply caulk in one continuous bead. Cut the tube tip at a 45-degree angle to match your joint width. Move the gun steadily at an even pace — stopping and starting creates lumps and voids.
Tool the bead immediately. Wet your fingertip or a caulk finishing tool with a water-dishwashing-soap mix and smooth the bead in one pass before it starts to skin over. Remove the tape while the caulk is still wet.
Let it cure completely before using the shower. See the section below on cure times.
What Are Common Caulking Mistakes to Avoid?
Applying new caulk over old caulk. This is the most common DIY mistake. The new bead never bonds to the substrate — it only bonds to the failing old layer and peels off within months.
Caulking a damp joint. Silicone does not adhere to wet surfaces. Even a surface that looks dry after an hour may retain moisture inside the grout and tile — wait a full 24 hours with ventilation running.
Using the wrong product. Grabbing a "tub and tile" or "kitchen and bath" caulk because it says waterproof on the label — without confirming it is 100% silicone — results in a bead that discolors and fails within a year.
Skipping backer rod on wide joints. Any joint wider than about 3/8 inch needs a foam backer rod inserted first; caulk bridging a wide gap unsupported will crack under normal flex.
Not using tape. A freehand bead on tile almost always wanders. Tape takes two minutes and produces a professional-looking finish every time.
Tooling with a dry finger. A dry finger drags and tears the bead. A soapy-wet finger or dedicated tool glides cleanly.
Can I Shower 12 Hours After Caulking?
No — 12 hours is not enough. Most 100% silicone caulks are touch-dry within 30 minutes to 1 hour but require a full 24 to 48 hours of cure time before any water exposure. Some products label a 24-hour minimum, but exposing a silicone bead to prolonged water saturation (as in a full shower) at 12 hours can cause the still-curing bead to lose adhesion at the substrate interface — meaning it looks fine but is no longer bonded properly. Check the specific product's data sheet and always wait the full cure time. For cold or humid bathrooms, 48 hours is the safer standard.
When Should You Call a Professional Instead?
DIY recaulking makes sense when the joint is small, the old caulk is in good condition except for surface discoloration, and you have the patience for proper surface prep. Call a professional like Groutastic when:
There is visible mold behind or beneath the caulk bead (black staining that goes into the grout or substrate)
Tiles are loose, hollow-sounding, or the grout between tiles is crumbling — joint caulking alone won't fix a deeper installation problem
The shower has multiple caulk lines to address (floor perimeter, all wall corners, door frame, niche edges, fixture penetrations) and DIY results have repeatedly failed
You are unsure whether you have completely removed all old silicone residue — an imperfect prep is the root cause of most recaulk failures
Groutastic serves Coram, NY and surrounding Suffolk County communities including Mount Sinai, Nesconset, and Moriches, offering residential and commercial surface cleaning and restoration that goes beyond a surface-level caulk replacement to assess grout condition, tile integrity, and the full scope of what each shower joint actually needs.
Frequently Asked Questions About Shower Caulking
What's the trick to caulking a shower neatly?
The single biggest trick is tape — apply painter's tape on both sides of the joint before you start, apply the bead in one continuous pass without stopping, smooth immediately with a wet finger or caulk tool, and pull the tape off before the silicone skins over. Trying to clean up a messy bead after the fact is far harder than preventing the mess with tape upfront.
Can I caulk over existing grout in shower corners?
Shower corners should never be grouted — they should always be caulked. Grout is rigid and cracks under the natural flex between two perpendicular tile planes. If your shower corners are currently grouted and cracking, the correct fix is to carefully remove the grout (not just apply caulk on top), clean the joint thoroughly, and fill it with 100% silicone caulk. This is a common error in original tile installations.
Does shower caulk prevent mold permanently?
No caulk prevents mold permanently. Even the best mold-resistant 100% silicone will eventually support surface mold growth if the shower is not ventilated adequately and cleaned regularly. Mold-resistant caulks include a biocide additive that inhibits growth, but it diminishes over years of use. Regular cleaning with a pH-neutral cleaner and proper bathroom ventilation extend caulk life significantly. If mold has penetrated beneath the caulk bead, the bead must be removed and replaced — surface scrubbing alone will not eliminate embedded mold. For guidance on identifying and dealing with deeper mold issues in your shower, see this overview of black mold in shower grout prevention and removal.
How do I know if my shower caulk is silicone or latex?
A simple field test: rub the existing bead with isopropyl (rubbing) alcohol on a cotton swab. Latex-based c
This article is based on real published content from Groutastic, cites authoritative sources, and is reviewed before publication.
Comments